

Essential Commands Every Dog Should Learn Before Age 2
Mastering the Basic Sit Command: Your First Step to a Well-Behaved Dog
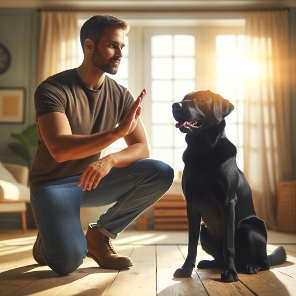
When it comes to dog training, there’s a universal truth: teaching your dog to master the “sit” command is one of the most fundamental steps you can take. Not only does it help in establishing control over your furry friend, but it also promotes a sense of calm behavior that benefits both you and your dog. In this guide, we will explore why teaching the sit command is crucial, offer step-by-step training instructions, and discuss common challenges you may face along the way.
The Importance of the Sit Command
Before we delve into the how-to of training your dog to sit, let’s take a moment to understand why this command is so essential.
- Establishes Control: The sit command is often the first command dogs learn. It sets a foundation for further training and establishes you as the leader in your relationship.
- Promotes Calm Behavior: A dog that knows how to sit is less likely to jump up on people, pull on a leash, or exhibit other unwanted behaviors. It encourages your dog to pause and take a breath.
- Improves Communication: Teaching your dog to sit helps enhance your communication skills. Your dog learns to respond to your cues, thereby strengthening your bond.
Step-by-Step Instructions for Teaching the Sit Command
Training your dog to sit can be enjoyable for both of you! Here’s a simple, step-by-step method to guide you through the process.
Step 1: Gather Your Supplies
Before you start, gather the following essentials:
- High-value treats: Choose treats that your dog loves.
- A quiet space: Find an environment with minimal distractions.
- A leash (optional): This can be useful for more energetic dogs.
Step 2: Get Your Dog’s Attention
- Begin in a Quiet Environment: Start in a location where your dog feels comfortable and is less likely to be distracted.
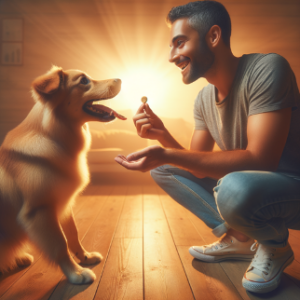
- Use their Favorite Treat: Hold the treat close to their nose to get their attention.
Step 3: The Motion
- Lure Your Dog: Once you have their attention, slowly move the treat over their head. This should encourage their head to follow the treat, resulting in their bottom naturally lowering to the ground.
- Say “Sit”: As their bottom hits the floor, clearly say the word “sit” in a calm and authoritative voice.
Step 4: Reward!
- Praise and Treat: As soon as your dog sits, offer ample praise and allow them to enjoy the treat. This reinforces the behavior.
- Repeat: Practice this repetition several times in short sessions (about 5-10 minutes), gradually phasing out the treats while continuing to offer praise.
Step 5: Practice with Different Scenarios
Once your dog has mastered this in a quiet setting, begin to practice in more challenging environments. This could be during walks, at the park, or when guests arrive. The key is to keep practicing under various conditions to solidify the behavior.
Common Challenges and How to Overcome Them
Teaching your dog to sit doesn’t always go smoothly. Here are some common challenges you may encounter and how to tackle them.
1. Distractions
Solution: Start in an environment free from distractions. Gradually introduce veiled distractions like another family member or toys, rewarding your dog for staying focused.
2. Boredom
Solution: Keep training sessions short and fun! Mix in playtime or a short walk to keep your dog engaged.
3. Resistant to Commands
Solution: Make the experience rewarding! Use high-value treats and ensure you are patient. If your dog doesn’t seem interested, it may be time to reassess the treats you’re using.
4. Jumping Instead of Sitting
Solution: If your dog jumps instead of sitting, take a step back. Adjust how you lure them, and avoid using high-verbal praise until they’ve successfully sat.
Conclusion: A Pathway to Good Behavior
Teaching your dog the sit command is not just about having them obey a simple trick. It is a building block for further training, is essential for establishing your authority, and most importantly, promotes a calm atmosphere. Remember, patience and consistency are key.
Now that you have the knowledge and tools needed to teach your dog to sit, it’s time to put them into practice!
The Stay Command: A Key to Safety and Obedience
Once your dog has mastered the sit command, it’s time to introduce another essential skill: the stay command. This invaluable command enhances your dog’s safety and reinforces their obedience in everyday situations. It can significantly reduce the risk of accidents and improve overall behavior, making outings more enjoyable for both of you. Let’s explore the importance of the stay command, techniques for teaching it effectively, and how positive reinforcement can make the learning process enjoyable.
The Importance of the Stay Command
Before jumping into the steps for teaching the stay command, it’s important to understand why this command is crucial for both safety and obedience.
- Enhances Safety: A well-trained stay command can prevent your dog from running into traffic or approaching unfamiliar animals. This command is particularly valuable in crowded areas or around distractions.
- Increases Obedience: Teaching your dog to stay builds their discipline and willingness to follow commands. It reinforces the bond of trust and respect between you and your furry companion.
- Encourages Calmness: When your dog knows the stay command, they learn to relax in various situations, reducing anxiety and hyperactivity. This can lead to a calmer household and more enjoyable outings.
Techniques for Teaching the Stay Command
Training your dog to stay doesn’t need to be a chore; following these steps, paired with positive reinforcement, guarantees a rewarding experience for both your dog and yourself.
Step 1: Set the Stage
Before you begin, make sure you have:
- High-value treats: Choose tasty options that your dog adores to ensure their motivation.
- A quiet space: Begin in a distraction-free area to help your dog focus.
- A leash (optional): Using a leash can provide added control, especially with beginners.
Step 2: Introduce the Command
- Start with the Sit Position: It’s best if your dog is already in a sitting position when teaching the stay command.
- Command the Stay: Hold your palm open facing your dog and clearly say “stay” in a calm voice. This hand signal reinforces the verbal command.
Step 3: Take Your Position
- Step Back Slowly: Once you’ve given the stay command, take a single step back.
- Return and Reward: If your dog stays in place, quickly return and reward them with praise and a treat. Timing is critical — reward them immediately after they’ve successfully completed the task.
Step 4: Increase the Distance and Duration
- Gradually Increase the Distance: Once your dog consistently stays for short distances, increase the space between you and your dog.
- Extend the Duration: As your dog becomes comfortable, gradually increase the time they should stay. Start at just a few seconds, and then work your way up to longer periods.
Common Challenges and How to Overcome Them
Like any training process, you may encounter challenges while teaching the stay command. Here’s how to handle them effectively:
1. Breaking the Stay
Solution: If your dog gets up prematurely, reset them to the sitting position gently and calmly. Reinforce the stay command again, rewarding them as they remain in place.
2. Distractions
Solution: Begin in a very serene location and slowly introduce distractions like toys or other people. Maintain patience and reward your dog for staying focused.
3. Short Duration
Solution: If your dog struggles to stay for more than a brief moment, revert to shorter durations. Gradually increase the duration as they become more consistent.
Conclusion: The Power of the Stay Command
Teaching your dog the stay command is vital for both safety and improved obedience. This command fosters a sense of calmness in occasionally chaotic environments and makes controlling your dog’s behavior easier in various settings. With positive reinforcement, patience, and practice, you will build a strong bond with your dog while ensuring their safety and reliability.
Come When Called: The Critical Role of the Come Command in Keeping Your Dog Safe
When it comes to dog training, the “come” command is not just a cue—it’s a lifeline for your furry friend. Imagine a scenario where your dog gets loose in a public park or encounters a potentially dangerous situation. The ability to call your dog back to you instantly could mean the difference between safety and disaster. In this guide, we will explore why the come command is crucial for the well-being of your dog, share methods for making this command reliable, and offer practical tips for practicing in various environments.
The Importance of the Come Command
Understanding the significance of the come command is vital for any dog owner. Here are a few compelling reasons why mastering this command should be a priority:
- Ensures Safety: The come command plays an essential role in preventing dangerous situations, whether it’s avoiding traffic, straying too far from home, or encountering aggressive animals.
- Strengthens Bond: Responding to the come command fosters trust and reinforces the bond between you and your dog. When your dog knows they can count on you for safety, they’re more likely to respond positively.
- Encourages Independence: While it may seem counterintuitive, teaching the come command allows your dog a bit of freedom in safe environments, knowing they can return to you when called.
### Step-by-Step Instructions for Teaching the Come Command
Training your dog to come when called can be a rewarding experience. Follow these intuitive steps for optimal results.
Step 1: Gather Your Supplies
Before you start, gather the following essentials:
- High-value treats: Select tasty morsels that your dog truly enjoys.
- A long leash: Using a long leash gives your dog more freedom while still allowing you to maintain control.
- A safe and quiet area: Begin in a distraction-free environment.
Step 2: Get Your Dog’s Attention
- Start in a Comfortable Location: Choose a quiet space where your dog feels at ease.
- Use a Friendly Tone: Cheerfully call your dog’s name to grab their attention.
Step 3: The Motion
- Encourage Movement: If you’re using a long leash, gently tug it to coax your dog forward. If they seem hesitant, run away a few steps while calling their name excitedly.
- Say “Come”: Use the command “come” clearly and consistently as your dog approaches you.
Step 4: Reward!
- Praise and Treat: As soon as your dog reaches you, shower them with praise and offer a treat. The positive reinforcement makes the experience enjoyable.
- Repeat: Practicing in short sessions of 5-10 minutes is ideal for maintaining your dog’s focus.
Step 5: Gradually Add Distractions
Once your dog consistently responds in a safe environment, begin to introduce distractions:
- Increase the Distance: Move further away as your dog becomes more reliable.
- Practice in Different Environments: Train in various settings—like your yard, a quiet park, or even during casual walks—each time rewarding your dog for their successful recall.
Training Tips for Various Environments
Training in diverse environments will help your dog generalize the command. Here are specific strategies to enhance your practice across different scenarios:
1. At Home
- Exciting Opportunities: Use everyday moments to reinforce the command—such as when it’s time for meals or playtime. Call your dog to you for a treat or to join in an activity.
2. At the Park or Open Areas
- Controlled Freedom: Start with your dog on a long leash. Gradually let them explore while you practice calling them back, ensuring they associate the command with positive outcomes.
3. With Distractions
- Practice with a Friend: Bring a friend along who can help introduce distractions, such as moving objects or toys, making it essential for your dog to focus on you.
Common Challenges and How to Overcome Them
Training your dog to come when called might present some hurdles. Here are common challenges you may face and strategies to resolve them:
1. Ignoring the Command
Solution: Use higher-value treats or engaging toys that excite your dog. Stay patient and give ample praise when they respond.
2. Getting Distracted by Other Dogs or People
Solution: Start your training session in a distraction-free zone. Once your dog reliably responds, gradually introduce more distractions while ensuring rewards remain enticing.
3. Only Coming When They Feel Like It
Solution: Always reward your dog for coming, no matter the situation. If your dog consistently chooses not to respond, review your reward system and make adjustments as necessary.
Conclusion: The Lifesaver Command
Teaching your dog the come command is a crucial aspect of training that enhances their safety, strengthens your bond, and allows for greater freedom in controlled environments. By utilizing patience, consistency, and positive reinforcement, you can develop a reliable recall for your canine companion that could one day save their life.

The Down Command: A Key to Calmness and Control
While mastering the sit command is an excellent foundation for any well-behaved dog, teaching your pup the “down” command is equally vital. The down command is more than just another trick; it’s a powerful tool for promoting relaxation, managing excitement, and improving your dog’s overall behavior in various situations. In this guide, we’ll delve into the importance of the down command, effective training strategies, and how it can benefit you and your furry friend in everyday life.
The Significance of the Down Command
Understanding why the down command matters can greatly enhance your training approach:
- Promotes Relaxation: The down position is inherently calming. When your dog learns to lie down on command, it helps them settle not just in your presence but also in stimulating environments.
- Control Over Excitement: Whether it’s during playtime, meet-and-greets with other dogs or humans, or even during car rides, having your dog lie down can curb excessive excitement and jumping.
- Responsible Ownership: A dog that knows how to control themselves in various scenarios not only reflects on your training abilities but contributes to a safer environment around friends, family, and strangers.
Step-by-Step Instructions for Teaching the Down Command
Training your dog to perform the down command doesn’t have to be overwhelming. Follow these simple steps to guide you through the process:
Step 1: Set Up Your Training Area
As with any training, a distraction-free environment can be highly beneficial. Have on hand:
- High-value treats: Use irresistible treats to motivate your dog.
- A calm setting: Choose a quiet place to help your dog focus.
Step 2: Getting Your Dog’s Attention
- Gather Your Dog: Ensure your dog is close to you and is likely to be interested in what you’re doing.
- Use Treats: Hold a treat in your hand to excite and engage your dog.
Step 3: The Motion
- Lure to the Ground: Move the treat slowly down toward the ground, allowing your dog to follow the treat with their nose. This should encourage their elbows to touch the ground as they lower themselves.
- Say “Down”: As soon as your dog’s elbows hit the floor, clearly voice “down.”
Step 4: Reward!
- Praise and Treat: Immediately reward your dog with the treat while providing enthusiastic praise. Reinforcement at the right moment encourages a lasting connection between the action and the reward.
- Repeat: Conduct several short training sessions daily, gradually fading the treat while still offering verbal praise.
Step 5: Practice in Different Environments
Once your dog has mastered the down command in a quiet space, it’s time to challenge them. Practice in various situations, such as during walks, in busy parks, or when greeting guests, to solidify their understanding of the command.
Overcoming Challenges During Training
You may face difficulties while teaching the down command. Here are some common challenges and solutions:
1. Inability to Lie Down
Solution: If your dog hesitates to lie down, try using a favorite toy or a different treat to encourage the behavior. Some dogs may need a little more time to get comfortable with this position.
2. Distractions from the Environment
Solution: Start in a quiet room. As your dog becomes more proficient, introduce mild distractions, such as another person walking by. Reward your dog for maintaining focus.
3. Jumping or Staying Standing
Solution: If your dog jumps up instead of lying down, go back to the luring phase. Use the treat closer to the ground, ensuring they understand the expected behavior.
4. Inconsistent Responses
Solution: Consistency is crucial. Ensure every family member uses the same verbal cue and approach to reinforce your dog’s understanding of the command.
Benefits of the Down Command in Everyday Situations
The down command can significantly benefit daily interactions with your dog:
- During Meal Prep: Having your dog lie down can reduce anxious behaviors, like begging or hovering around the kitchen.
- When Visitors Arrive: A quick “down” can help keep your dog calm, making a positive first impression on guests.
- On Walks: Use the command when approaching other dogs or people to help your pup practice self-control and maintain focus on you.
- In Busy Public Places: Teaching your dog to lie down in cafés or parks can prevent overstimulation and help them adapt to various environments.
Conclusion: Your Ongoing Journey to a Calm Companion
The down command serves as a foundational piece in shaping a calm, well-behaved dog. By incorporating this essential command into your training routine, you are not only promoting relaxation and self-control but also enhancing the bond you share with your furry friend. Remember, patience and practice will ensure successful outcomes.

The Importance of the “Leave It” Command
Just as mastering the “sit” command is pivotal for establishing control over your dog, teaching the “leave it” command is equally crucial for promoting safety and good behavior. The “leave it” command functions as a protective measure that helps prevent your dog from interacting with harmful objects, potentially dangerous animals, or even inappropriate food. This command can save your dog from harm, keep them safe during outings, and foster better behavior in social situations.
- Preventing Harmful Intake: Dogs naturally explore their environment with their mouths. Whether it’s a sharp object, toxic substance, or spoiled food, knowing the “leave it” command can prevent health issues or injuries.
- Promoting Good Behavior: Instead of pulling towards distractions, your dog will learn to respond to your command, enhancing their obedience and patience throughout various scenarios.
- Fostering Control During Outings: Whether you’re at a park, on a hike, or simply walking down the street, teaching your dog “leave it” can help manage their behavior when they encounter other dogs, wildlife, or tempting smells.
Step-by-Step Instructions for Teaching the “Leave It” Command
Training your dog to respond to “leave it” can be accomplished with patience and consistency. Below are actionable steps to guide you through the process.
Step 1: Gather Your Supplies
Before you jump into training, gather these essential items:
- High-value treats: Use treats that your dog finds irresistible.
- A toy or a common object: Find something your dog may want to investigate.
- A quiet, distraction-free environment: This will help keep your dog focused during training.
Step 2: Introduce the Command
- Show the Object: Hold the toy or object in one hand while keeping a treat in the other.
- Use Their Focus: Allow your dog to sniff or look at the object. Once they seem interested, say “leave it” in a clear, firm voice.
Step 3: The Distraction
- Reward Right After: If your dog looks away from the object and back at you after hearing “leave it,” immediately give them the treat and praise them with a cheerful tone.
- Gradual Increase in Difficulty: Slowly increase the challenge by placing the object on the ground while leash handling to prevent your dog from going for it. Repeat the “leave it” command as necessary.
Step 4: Practice, Practice, Practice
- Continue in Various Environments: Once your dog has mastered the command in a calm environment, practice outdoors where distractions are more frequent. This could be at the park with other dogs playing nearby or during encounters with food on the sidewalk.
- Use Random Scenarios: When you notice your dog about to interact with something inappropriate, use the command immediately, rewarding them when they comply.
Common Challenges and How to Overcome Them
While teaching the “leave it” command, you may encounter challenges. Here’s how to address them effectively:
1. Concentration Issues
Solution: Begin in a quiet area where your dog won’t be easily distracted. Gradually increase the intensity of distractions as your dog becomes more confident in obeying the command.
2. Disinterest in the Command
Solution: Ensure that you’re using high-value treats that genuinely excite your dog. If your dog doesn’t respond positively, it may be beneficial to try different rewards, including their favorite toys.
3. Pulling Toward Objects
Solution: If your dog is overly enthusiastic about the object, use a leash to gently guide them away while repeating “leave it.” Consistent training will reinforce that stepping away from distractions pays off with praise and treats.
4. Ignoring the Command in New Environments
Solution: Consistency is key in varied settings. Make sure to practice the command several times in different environments so your dog understands that “leave it” applies everywhere.
Conclusion: A Safer, More Controlled Experience
Teaching your dog the “leave it” command is vital for their safety and your peace of mind. It empowers you to redirect your dog’s attention away from potential hazards and encourages better behavior in social situations. With consistent practice and clear communication, you’ll help your dog learn to leave potentially harmful objects and unsavory encounters behind.

Heel Command: Ensuring Safe and Enjoyable Walks with Your Dog
Once your dog has mastered the sit command, the next critical skill is the heel command. A well-trained dog that understands how to heel can make walks not only safer but also much more enjoyable for both dog and owner. In this section, we will explore the importance of the heel command, provide step-by-step instructions for teaching it, and share tips for overcoming common challenges.
The Importance of the Heel Command
Teaching your dog to heel is essential for a variety of reasons:
- Safety First: Ensuring your dog walks next to you reduces the risk of them lunging towards other dogs, people, or distractions, which can be particularly crucial in busy environments or urban settings.
- Better Control: A dog that heels remains close and under your control, which makes navigating crowded areas or busy streets much easier.
- Improved Bonding: Walking side by side encourages a stronger bond between you and your furry friend, as it requires teamwork and communication.
Step-by-Step Instructions for Teaching the Heel Command
Getting your dog accustomed to the heel command requires patience and consistency. Follow these simple steps to effectively teach your dog this essential skill:
Step 1: Choose Your Equipment
Before starting your training, make sure you have the right tools:
- A well-fitted collar or harness: Choose a collar that doesn’t choke or restrict your dog’s movement and ensures their safety.
- A sturdy leash: A standard leash (4-6 feet in length) is ideal for training. Avoid retractable leashes until your dog has mastered the command.
- High-value treats: These should be special enough to keep your dog motivated during training.
Step 2: Get Started
- Find a Distraction-Free Zone: Start indoors or in a quiet outdoor area.
- Position Your Dog: Stand with your dog at your side, preferably on the left side (as is standard practice for heeling).
Step 3: Use Lures and Movement
- Show the Treat: Hold a treat close to your dog’s nose to capture their attention.
- Start Walking: Begin to walk forward while encouraging your dog to follow you. Use the command “heel” in a cheerful tone.
- Reward When They Stay Close: If your dog walks alongside you without pulling ahead, praise them and offer a treat within a few steps. It’s crucial that you reward immediately to reinforce this positive behavior.
Step 4: Establish the Right Pace
- Keep Moving: A consistent pace is important. Your dog should learn to match your speed, so practice varying your walking rhythm.
- Correcting Pulling: If your dog begins to pull ahead, stop walking immediately. Wait for them to return to your side, then reward when they comply.
Step 5: Gradually Increase Distractions
- Short Sessions: Practice for approximately 5-10 minutes to keep your dog engaged.
- Add Distractions: Once your dog has mastered heeling in a quiet environment, gradually introduce distractions (like other dogs, people, or noises) to solidify their training.
Common Challenges and How to Overcome Them
Training your dog to heel isn’t without its hurdles. Here are some common challenges you might face and solutions to help you navigate them:
1. Pulling on the Leash
Solution: Use the “stop and wait” technique. When your dog pulls, immediately come to a stop and don’t move until they return to your side. Reward them for staying close, emphasizing the importance of walking calmly.
2. Distractions
Solution: Practice in increasingly distracted environments. Start with lower distractions and progress to busier areas, rewarding your dog for maintaining focus.
3. Boredom
Solution: Keep training exciting by mixing up your routes or incorporating fun rewards like a toy or a game after a successful session.
4. Inconsistent Behavior
Solution: Consistency is key! Make sure you and anyone else who walks your dog uses the same commands and techniques to avoid confusion.
5. Not Responding to Commands
Solution: If your dog isn’t responding, consider reassessing your training methods. Ensure you’re using high-value treats and varying your rewards to keep your dog motivated.
Conclusion: The Path to a Successful Walking Experience
Mastering the heel command not only promotes safe walks but also strengthens the bond between you and your dog. With consistency and the right techniques, you can cultivate an enjoyable walking experience for both you and your furry companion. Remember, patience and positive reinforcement are crucial.
Mastering the Off Command: Discouraging Unwanted Behaviors
While the sit command lays the foundational skills needed for good behavior, the “off” command serves as a vital tool for discouraging unwanted actions, particularly those pesky behaviors like jumping on people and furniture. In this guide, we will dive into the significance of the off command, how to effectively train it, and why consistent usage is key in various communicative situations.
The Importance of the Off Command
The “off” command is just as essential as “sit.” Here’s why:
- Prevents Unwanted Jumping: Whether it’s excitement when guests arrive, or trying to claim a cozy spot on the couch, the off command helps manage these impulsive behaviors.
- Creates Boundaries: Setting clear boundaries is crucial for a harmonious living environment. The off command aids in establishing these boundaries, teaching your dog where they are and are not allowed.
- Enhances Safety: A dog that jumps on people can cause accidents or injuries. Teaching the off command mitigates these risks, allowing you to have better control in public spaces.
Step-by-Step Instructions for Teaching the Off Command
Teaching your dog the off command is straightforward. Here’s how you can do it:
Step 1: Outfitting Yourself with Supplies
Before starting, make sure you have everything you need:
- High-value treats: These should be special and appealing to your dog.
- A leash (optional): A leash can help manage your dog during the training process.
- A designated spot: Choose an area where unwanted behavior typically occurs, like the front door or near the sofa.
Step 2: Identify the Behavior
- Recognize Triggers: Notice what causes your dog to jump or get on furniture. It may be excitement due to guests or eagerness to sit on your lap.
- Use a Consistent Cue: Clearly say “off” when your dog is engaging in the unwanted behavior—in a firm yet calm manner.
Step 3: Redirect the Behavior
- Lead Them Away: If your dog jumps up, gently guide them down or away from the furniture using a treat as a lure.
- Once On the Ground: As your dog is on the floor, immediately praise them and offer a treat. This reinforces that being off is a good behavior.
Step 4: Practice, Practice, Practice
- Repeat Consistently: Whenever the unwanted behavior occurs, consistently use the command “off” and follow through with rewards when your dog responds correctly.
- Include Different Scenarios: Practice in various situations—like when guests arrive or when you’re eating dinner—to help your dog generalize the behavior.
Common Challenges and How to Overcome Them
Training the off command may present its own set of challenges. Here are the most common hurdles and their solutions:
1. Ignoring the Command
Solution: Remain patient and consistent. If your dog doesn’t respond to “off” immediately, guide them gently down before reinforcing with praise and rewards.
2. Reverting to Old Behaviors
Solution: Consistency is key. Always enforce the off command whenever they jump or land on furniture. Remember, repetition solidifies training.
3. Excitable Behavior with Guests
Solution: Ask guests to ignore your dog when they first arrive. Encourage them to stand still or turn away until your dog calms down, providing a perfect opportunity to reinforce the off command.
4. Identifying Triggers
Solution: Conduct a training session where you replicate scenarios where your dog usually jumps. This helps in teaching your dog to stay calm during expected triggers.
Conclusion: The Foundation of Good Manners
Mastering the off command can create a positive impact on your dog’s behavior, allowing for a more balanced and enjoyable home environment. By practicing regularly and maintaining consistent usage, you establish clear communication, which fosters better understanding between you and your dog.
Now that you’re equipped to teach your dog the off command, it’s time to implement your new skills!
Mastering the “No” Command: Key to Correcting Unwanted Behavior
Just as the “sit” command serves as a foundation for good behavior, the “no” command is vital in teaching your dog what not to do. This command plays an essential role in correcting unwanted behaviors, such as jumping on guests, chewing furniture, or barking excessively. By learning how and when to effectively use the “no” command along with positive redirection, you can foster a more obedient and well-mannered canine companion. In this section, we will explore the importance of using the “no” command, effective strategies for its application, and how to seamlessly pair it with positive reinforcement techniques.
The Significance of the “No” Command
Understanding the strength of the “no” command helps create an environment where your dog learns the boundaries of acceptable behavior. Here are some key points to consider:
- Immediate Feedback: The “no” command provides instant feedback to your dog when they engage in unwanted behaviors, clarifying what is unacceptable.
- Promotes Safe Behavior: Using “no” can alert your dog to potentially dangerous situations, such as getting too close to a busy street or chewing on something hazardous.
- Establishes Leadership: Effectively using the “no” command reinforces your role as the leader, ultimately cultivating a healthier owner-pet relationship.
When to Use the “No” Command
The timing of the “no” command is critical for its effectiveness. Here are some situations where it can be particularly beneficial:
- During Unwanted Actions: Use the “no” command immediately when you catch your dog engaging in undesirable behaviors such as barking excessively, jumping on people, or stealing food.
- In Response to Dangerous Situations: If your dog is heading towards a dangerous object or situation, a firm “no” can redirect their attention and keep them safe.
- As a Preventive Measure: Anticipate unwanted behavior and preempt it with “no.” For instance, if your dog shows signs of barking at a passing car, say “no” before it escalates.
Pairing “No” with Positive Redirection
While the “no” command is crucial for discouraging unwanted behavior, it’s equally important to teach your dog what they can do instead. Positive redirection is a powerful technique to replace negative behaviors with desirable actions. Here’s how to implement this approach effectively:
- Identify Destructive Behaviors: Recognize what undesirable behaviors you want to curb. For example, if your dog tends to chew on furniture, make a note of it.
- Introduce Alternatives: While using the “no” command, offer an alternative behavior your dog can engage in. If your dog jumps on guests, use “no” followed by asking them to “sit” instead.
- Reward the Right Behavior: Once your dog complies with your redirected command, immediately provide praise, treats, or playtime. Reinforcing this desired behavior makes it clear they are being rewarded for what you want them to do rather than just correcting what they should not do.
- Stay Consistent: Consistency is key in reinforcing the “no” command and redirection. Continually practice these alternatives to help your dog solidify their new behaviors.
Real-World Examples
To help illustrate the effectiveness of the “no” command combined with positive redirection, here are a couple of scenarios:
- Example 1: Your dog barks excessively at the doorbell. As soon as they start barking, say “no” in a calm but firm tone. Then, redirect them to their bed or a designated quiet space and reward them with treats for being calm.
- Example 2: If your dog jumps up on the counter to grab food, firmly say “no.” Redirect them to a specific spot in the room (like their mat) while rewarding them for staying down. Over time, they will learn that being on their mat is more rewarding than counter surfing.
Addressing Possible Challenges
Implementing the “no” command isn’t without its challenges. Here are some potential hurdles and strategies to overcome them:
- Ignoring the Command: If your dog seems unfazed by “no,” assess your tone and approach. Ensure it is firm but not aggressive and paired with a straightforward redirection.
- Inconsistent Reinforcement: Avoid confusing your dog by being inconsistent. If you occasionally allow certain behaviors, it becomes unclear what is acceptable. Ensure all family members are on the same page.
- Negative Association: Be mindful not to solely use “no” as a punishment. This can create anxiety associated with you. Always balance corrections with positive reinforcement to create a harmonious relationship.
Conclusion: Mastering Control through the “No” Command
The “no” command is an essential component of effective dog training, enabling you to guide your dog toward better behavior and reinforce your role as a leader. By pairing this command with positive redirection, you foster an environment where your dog understands acceptable behavior while feeling motivated to improve.
Wait Command: Understanding Its Importance & Effective Training Techniques
The “wait” command is an invaluable part of dog training, particularly in situations where safety is paramount. Whether navigating doorways, encountering distractions, or facing potentially dangerous environments, teaching your dog to wait can help protect them from harm and improve their behavior. This guide will elaborate on the significance of the wait command and offer effective training methods to help your dog master this essential skill.
The Importance of the Wait Command
Before we get into the training aspect, let’s discuss why the wait command is crucial for both you and your dog:
- Safety First: The wait command is vital in scenarios where your dog could rush into danger, such as stepping out onto a busy street or meeting new people without proper introduction.
- Impulse Control: This command helps reinforce impulse control in your dog, teaching them to stay put until they receive a release cue, rather than reacting immediately to stimuli.
- Enhanced Focus: Training your dog to wait can minimize distractions, allowing them to concentrate on your commands, which is essential for effective training.
Step-by-Step Instructions for Teaching the Wait Command
Training your dog to understand and respond to the wait command doesn’t have to be overwhelming. Here’s a detailed method to guide you through the process:
Step 1: Choose the Right Setting
To start, find a quiet, distraction-free area for training. This environment will help your dog focus better.
Step 2: Get Your Dog’s Attention
- Use Treats: Grab your dog’s favorite treats to entice them.
- Positioning: Stand with your dog at a doorway or in front of a threshold, where you want them to learn the wait command.
Step 3: The Command
- Introduce the Cue: Clearly say “wait” while holding your hand in front of them like a stop signal.
- Back Away: Take a step back while maintaining eye contact with your dog. If they remain in place, offer praise and a treat.
Step 4: Gradual Distance Increase
- Extend Your Distance: Gradually increase the distance from your dog while repeating the wait command. Start with small steps back, and increase as your dog becomes more comfortable.
- Practice in Different Scenarios: Practice at doorways, sidewalks, or around other animals and people to reinforce the wait command in various situations.
Step 5: Reinforcement and Release
- Rewarding Good Behavior: Anytime your dog waits patiently, reward them with verbal praise and treats. Positive reinforcement is key to solidifying this behavior.
- Release Command: Teach an exit command like “okay” after each wait session, which signals to your dog that they can move. Reinforce this with enthusiasm so your dog knows waiting leads to exciting outcomes.
Common Challenges and How to Overcome Them
Despite your best efforts, you may encounter challenges when teaching the wait command. Here are some common issues and how to address them:
1. Breaking the Wait
Solution: If your dog breaks position, calmly lead them back to the starting point and repeat the command. Avoid harsh reprimands; instead, focus on reinforcing their success once they comply.
2. Distractions
Solution: Begin in a controlled environment with minimal distractions. As your dog becomes proficient, slowly introduce distractions and reward them for maintaining focus.
3. Long Duration Waits
Solution: Start with short wait durations and gradually extend the time as your dog becomes more reliable. Patience is crucial; abrupt increases can lead to confusion.
4. Ignoring the Command
Solution: Ensure that your training is engaging. If your dog appears disinterested, consider switching treats or adjusting the training environment to re-spark their motivation.
Conclusion: The Role of the Wait Command in a Well-Trained Dog
Teaching your dog the wait command is not merely a useful skill; it’s a critical safety tool for you and your furry companion. It fosters impulse control and ensures that your dog learns to respond to commands even when the world around them is buzzing with distractions.
By incorporating the wait command into your training routine, you are taking a significant step towards a well-behaved and safe dog. Remember to remain patient and consistent throughout the process.

The Drop It Command: A Crucial Safety Measure for Your Dog
As a responsible dog owner, ensuring your furry friend’s safety is a top priority. One of the most effective ways to prevent your dog from chewing on harmful objects or ingesting potentially dangerous items is to teach them the “drop it” command. This command serves as an essential safety measure, reinforcing your dog’s understanding of boundaries and promoting a healthier, safer environment. In this guide, we will explore the significance of the drop it command, provide a step-by-step training approach, and share practical tips to establish this crucial command.
Why the Drop It Command is Essential
The drop it command is vital for several reasons:
- Prevents Ingestion of Harmful Objects: Dogs are naturally inquisitive and may pick up dangerous items like medications, toxic plants, or choking hazards. The drop it command gives you control over such situations.
- Promotes Positive Behavior: Teaching your dog to drop unwanted items encourages them to listen to you and reinforces good behavior. It helps them understand that certain objects are off-limits.
- Strengthens the Bond: Training your dog to obey the drop it command not only enhances communication but also fosters trust between you and your pet.
Step-by-Step Instructions for Teaching the Drop It Command
Teaching your dog the drop it command can be a rewarding experience. Follow these clear, sequential steps to train your dog effectively.
Step 1: Choose High-Value Treats
Before you get started, gather some high-value treats that your dog loves. These should be enticing enough to motivate them to comply with your command.
Step 2: Begin Training with a Safe Toy
- Select a Toy: Choose a toy that your dog loves, preferably one that is larger than your hand to encourage your dog to grab it comfortably.
- Encourage Play: Begin by engaging your dog in a fun game of tug or fetch with the toy. This will make them excited and invested in the play session.
Step 3: Introduce the Command
- Trigger the “Drop It” Situation: After your dog has been enjoying the toy, gently pull on it to create a scenario where they have to let go to continue.
- Say “Drop It”: As soon as they release the toy, clearly say “drop it” in a calm, authoritative voice.
Step 4: Reward Quick Compliance
- Reward Immediately: The moment your dog drops the toy, praise them enthusiastically and provide a high-value treat. This positive reinforcement helps them associate the command with a reward.
- Repeat: Practice several times in short sessions. Aim for about 5-10 minutes, focusing on the repetition of the command and the rewarding process.
Step 5: Add Variety
Once your dog starts to understand the drop it command with their favorite toy, begin varying the items you use for the training. Transition to different toys, objects like a ball, or even treats. This helps solidify their understanding that “drop it” applies to anything in their mouth.
Common Challenges and How to Overcome Them
Despite your best efforts, you might face some challenges while teaching the drop it command. Here are a few common issues and how to address them:
1. Ignoring the Command
Solution: Ensure you’re using high-value treats during training. If they seem disinterested, it might be time to reassess the reward. Aim for treats they truly love!
2. Playing Keep-Away
Solution: If your dog refuses to drop the item and plays keep-away, try using two toys. When they drop one to chase the other, say “drop it” and reward them immediately.
3. Difficulty Transitioning to Real-Life Scenarios
Solution: Start using the drop it command in controlled environments, gradually introducing it in more distracting settings. Consistency is critical here.
4. Inconsistent Responses
Solution: Be patient and consistent with your practice sessions. If your dog doesn’t respond right away, revisit the basics and recreate the fun environment where the command was initially learned.
The Importance of Patience and Consistency
Training your dog to master the drop it command requires patience and consistency. Make sure to keep training sessions fun and engaging. Encourage lots of positive interactions between you and your dog, reinforcing the idea that following your command will lead to wonderful rewards.
Conclusion: Ensuring Your Dog’s Safety through Training
In conclusion, the drop it command is an invaluable tool for enhancing your dog’s safety and promoting good behavior. Through consistent training and rewarding experiences, you can empower your furry friend to understand boundaries and desires. By establishing this command, you’re not only safeguarding your dog against harmful objects but also enhancing your communication and trust.
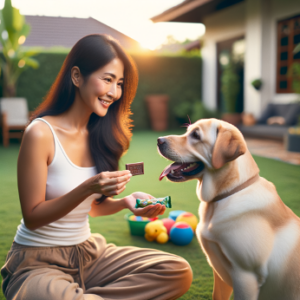
Introducing the Gentle Command: A Vital Tool for Playtime Control
Once your dog has mastered the sit command, it’s time to explore another essential aspect of training: the gentle command. This command is particularly beneficial for controlling aggression or excessive enthusiasm during playtime, ensuring that your dog remains friendly and calm. Below, we will outline techniques for teaching this command while reinforcing positive behaviors that will contribute to your dog’s overall training success.
Understanding the Gentle Command
The gentle command encourages your dog to control their excitement, whether they’re playing with you, other dogs, or simply greeting guests. This command can help mitigate aggressive behaviors, such as excessive barking, jumping, or rough play.
- Promotes Safety: By teaching your dog to be gentle, you’re helping to prevent accidental injuries, whether to themselves, other dogs, or people.
- Enhances Socialization: A dog that understands the gentle command is more likely to interact positively with other pets and people.
- Develops Impulse Control: This command can improve your dog’s ability to self-regulate their behavior, which is crucial for training and everyday interactions.
Techniques for Teaching the Gentle Command
Training your dog to respond to the gentle command is a rewarding process. Here’s a step-by-step approach to help you implement this command effectively.
Step 1: Introduce the Command
- Choose a Calm Moment: Find a time when your dog is not overly excited. This could be during a quiet moment in the house or right after they’ve engaged in a play session.
- Use a Consistent Cue: Decide on a word or phrase, such as “gentle,” that you will consistently use during training.
Step 2: Use High-Value Treats
- Bring Out Your Treats: Have a supply of high-value treats ready to reward your dog for gentle behavior.
- Capture the Behavior: As your dog plays, observe their actions closely. Whenever they begin to show signs of aggression or roughness, use the gentle command immediately.
Step 3: Reinforce Positive Behaviors
- Reward Calmness: If your dog stops and calms down upon hearing the gentle command, provide a treat and praise. This positive reinforcement will help them associate the command with a rewarding outcome.
- Teach Through Play: If your dog gets too excited during play, use the gentle command. When they respond appropriately, even if it means they momentarily stop, reward their behavior.
Step 4: Practice with Distractions
- Start with Low Distractions: Begin practicing in a quiet environment and gradually introduce distractions—like toys or other dogs—while issuing the gentle command.
- Use Leash Control If Necessary: For dogs that tend to get overly excited with playmates, consider using a leash to help maintain control during the initial stages of learning.
Common Challenges and Solutions
Training the gentle command may not be straightforward. Here are some common hurdles and effective strategies to navigate them.
1. Excitement Overwhelming Them
Solution: If your dog becomes overly excited and ignores the command, take a step back. Allow them to settle before trying again. Shorten the training sessions and end on a positive note when they successfully demonstrate gentleness.
2. Inconsistent Responses
Solution: Consistency is vital. Use the gentle command every time your dog displays rough behavior, ensuring you do not confuse them with other commands. This will help them associate the cue effectively.
3. Ignoring the Command During Play
Solution: In the initial stages, your dog may not respond due to excitement. For this reason, consider using a cue to pause play. When they calm down, then issue the gentle command to reinforce that calmness leads to continued play.
Real-World Applications of the Gentle Command
Utilizing the gentle command can significantly impact your dog’s interactions with others. For example, during playdates with other dogs, the gentle command can help manage energy levels and prevent roughhousing. This not only keeps the play safe but promotes harmonious relationships among dog owners.
Another great opportunity to reinforce the gentle command is when your dog greets visitors. Training your dog to greet humans gently ensures a positive experience for everyone involved, especially for those who may feel intimidated by your dog’s size or energy.
Conclusion: Building a Foundation of Calmness
Incorporating the gentle command into your training regimen helps lay the groundwork for a well-behaved, socially adept dog. By reinforcing this command, you’re not just teaching them to be gentle but also fostering essential social skills.
As you embark on your training journey with the gentle command, remember that patience, consistency, and positivity are crucial. Incorporating play with learning can make the process enjoyable for both you and your furry friend.
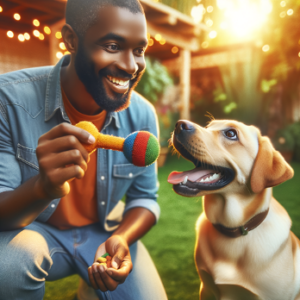
Teaching Fetch: Fun, Exercise, and Controlled Play
Fetch is a timeless game that not only provides a fun bonding experience between you and your dog but also offers great physical exercise. However, it’s crucial to establish control over the game to ensure that it remains safe and engaging for both you and your furry friend. In this guide, we will delve into the benefits of teaching your dog to fetch, provide effective training methods, and stress the importance of control to make this activity enjoyable and safe for everyone involved.
The Benefits of Teaching Fetch
Engaging in a game of fetch isn’t just a great way to blow off steam; it comes with numerous benefits that contribute to your dog’s overall well-being.
- Physical Exercise: Dogs are naturally active creatures, and a game of fetch allows them to run and expend energy, reducing the chances of behavioral issues caused by pent-up energy.
- Mental Stimulation: Fetch is not just a game of running; it also requires your dog to think, strategize, and perform tasks, providing mental engagement that can help prevent boredom.
- Strengthens the Bond: Playing fetch creates a valuable opportunity for interaction and connection between you and your dog, reinforcing your relationship.
- Teaches Valuable Commands: Fetch can be an effective way to teach your dog commands like “drop it,” “come,” or “stay,” reinforcing good behavior and obedience.
Methods to Effectively Train Your Dog to Fetch
Training your dog to fetch can be an enjoyable endeavor. Here’s how to get started with step-by-step instructions:
Step 1: Choose the Right Equipment
Select a suitable toy or ball that’s safe and easy for your dog to carry. Make sure it’s not too heavy and is the right size for your dog’s mouth.
Step 2: Create Excitement
- Engage Their Interest: Start by showing the toy to your dog. Use an enthusiastic tone to get them excited about the fetch toy.
- Introduce the Concept: Toss the toy a short distance away, encouraging your dog to chase it.
Step 3: Reward and Encourage Retrieval
- Praise When They Pick It Up: As soon as your dog retrieves the toy, use positive reinforcement. Praise them enthusiastically to encourage the behavior.
- Use Treats: If they’re hesitant to return the toy, use treats or additional toys to coax them back to you.
Step 4: Teach “Drop It”
- Encourage Them to Release: Use the command “drop it” by offering a treat to entice your dog to drop the toy.
- Reinforce with Praise: Once they release the toy, immediately praise them and give them the treat.
Step 5: Gradual Increase in Distance
Once your dog has mastered retrieving the toy from short distances and returning it, increase the throwing distance gradually. Continue to use praise and treats to reinforce the behavior.
Step 6: Ensure Safety and Control
To maintain control during the game:
- Use a Leash: Especially in the early stages, consider putting your dog on a long leash during fetch. This will allow you to maintain control over your dog while reinforcing the commands.
- Supervise Play: Always supervise your dog when playing fetch, especially in open areas. This ensures they don’t chase after distractions or run into hazardous situations.
Establishing Control Over the Fetch Game
While fetch is a fun game, it’s essential to maintain control to ensure a positive experience. Here are some crucial areas to focus on:
- Setting Boundaries: Choose specific areas where fetch is allowed. Avoid throwing the toy near roads or areas with heavy foot traffic.
- Understanding Your Dog’s Limits: Pay attention to your dog’s stamina. If they look tired or disinterested, it’s time to slow down or take a break.
- Utilizing the “Leave It” Command: Teaching this command will help prevent your dog from chasing distractions that may arise during fetch, such as other animals or people.
- End the Game on a High Note: Conclude the game while your dog is still excited and engaged. This will leave a positive association with fetch and make them eager for future play sessions.
Common Challenges and How to Overcome Them
Training your dog to fetch does come with its challenges. Here’s how to handle some common issues:
1. Disinterest in Fetch
Solution: Try varying the toy or using a different type of fetch item to spark interest. Also, consider playing in a new location.
2. Reluctance to Return the Toy
Solution: Use high-value treats to lure them back or encourage them to engage with you before tossing the toy again.
3. Overexcitement
Solution: Keep sessions short and controlled. Incorporate breaks to manage your dog’s excitement levels and avoid overstimulation.
4. Distractions
Solution: If your dog gets distracted easily, practice in a quieter setting to work on their focus before gradually introducing distractions.
Conclusion: The Joy of Fetch with Responsibility
Teaching your dog to fetch is a rewarding way to provide them with both physical and mental entertainment while strengthening your bond. Remember that control is essential in this game to ensure safety and enjoyment for both you and your dog. By using the techniques outlined above and reinforcing positive behavior, you can cultivate a fulfilling game of fetch that keeps your canine companion healthy and happy.

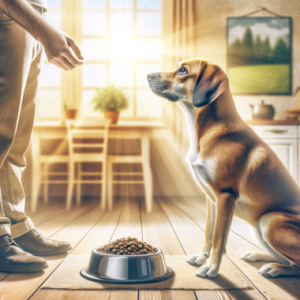
Wait for Food Command: Promoting Patience and Good Manners During Feeding
Once your dog has mastered the “sit” command, the next essential skill to instill is the “wait for food” command. This command enhances your dog’s patience and good manners during feeding time, creating a more enjoyable experience for both of you. Much like the “sit” command helps establish control, teaching your dog to wait teaches impulse control and sets the stage for more advanced trainings.
The Importance of the Wait for Food Command
Implementing the “wait” command during feeding time brings several benefits to your dog’s behavior and your daily routine:
- Encourages Calmness: By requiring your dog to wait patiently for their food, you help cultivate a calm atmosphere during meals, reducing excitement or anxiety.
- Enhances Impulse Control: Teaching your dog to wait before they dive into their food teaches them to control their impulses, a skill that benefits various situations beyond mealtime.
- Improves Good Manners: A dog that can wait for food is less likely to beg, jump on you, or snatch food from others’ plates.
- Strengthens Your Bond: When your dog learns to listen and wait, it enhances your communication and strengthens the bond between you.
Step-by-Step Instructions for Teaching the Wait Command
Getting your dog to wait before they eat is a valuable training process that requires consistency and patience. Here’s how to do it effectively:
Step 1: Prepare for Training
Before you begin, gather your supplies:
- Your dog’s favorite food or treats: This will be used to reward them during training.
- A quiet feeding area: Choose a space with minimal distractions where your dog feels comfortable.
Step 2: Introduce the Command
- Let Them See the Food: Place your dog’s food bowl on the ground where they can see it but not reach it.
- Use the Command: Use a clear and firm command like “wait” as you position the bowl.
Step 3: Encourage Sitting and Stability
- Settle Your Dog: If your dog tries to approach the food, gently guide them back to a sitting position.
- Reward Staying Calm: Using treats, reward your dog for remaining calm and in place whenever they are not approaching the food.
Step 4: Gradually Release
- Wait a Few Seconds: Start with a short delay of maybe 5 seconds before saying “Okay” to allow your dog to eat.
- Introduce Variable Time: Gradually increase the duration they must wait before accessing the food as they become more patient.
Step 5: Consistency is Key
- Practice Daily: Consistently practice the “wait” command during every meal time. Consistency reinforces the behavior you want to see.
- Vary Environments: Try practicing in different locations to help your dog generalize the command — even at friends’ houses or during family gatherings.
Common Challenges and How to Overcome Them
While training your dog to wait for their food, you may face several challenges. Here’s how to tackle them effectively:
1. Excitement and Impatience
Solution: If your dog is overly excited about food, practice training when they are slightly hungry. Use a calm tone to voice commands, and start with shorter waiting times to gradually build their patience.
2. Ignoring the Command
Solution: If your dog tends to ignore the command, ensure that your energy and focus during training sessions are high. Be patient but assertive; if they don’t listen, don’t reward them until they demonstrate the desired behavior.
3. Returning to Old Habits
Solution: If your dog reverts to old behaviors, revisit the training in sessions that reinforce patience. Make each feeding time a fresh opportunity for them to succeed.
4. Distractions from Other Pets or People
Solution: When other pets or people are present, have your dog practice waiting in a more controlled environment first. As they get better, you can try practicing with mild distractions, gradually increasing the intensity.
Conclusion: A Foundation for Manners and Impulse Control
Teaching your dog the “wait for food” command is not just about stopping an impulsive behavior; it’s an important step in nurturing a well-mannered and patient canine companion. The skills gained through this command can transition into many aspects of your dog’s behavior, improving their overall quality of life and your relationship with them.
With patience, consistency, and the strategies outlined here, you will find yourself enjoying mealtimes with a well-mannered pup who understands the value of waiting.
Go to Your Place Command: Encouraging Relaxation in Designated Areas
Just as mastering the “sit” command sets the groundwork for good behavior in dogs, teaching your dog the “go to your place” command provides them with a designated spot for relaxation and tranquility. This command serves not only to create a peaceful environment for your household but also enriches your dog’s life by giving them a space to feel secure and calm. In this guide, we will explore the importance of the “go to your place” command, offer strategies for teaching it effectively, and discuss the myriad benefits it holds for both your dog and your home.
The Importance of the “Go to Your Place” Command
Learning to go to their designated area is a crucial command for dogs, primarily because:
- Promotes Calmness: When dogs know they have a safe space to retreat, it helps reduce anxiety, hyperactivity, and other unwanted behaviors.
- Encourages Independence: Dogs learn to be comfortable alone, which can be particularly beneficial during times when household activity ramps up, like parties, visits from guests, or even when you’re cooking.
- Establishes Boundaries: It reinforces your role as a leader by clarifying where your dog is allowed to be when you need them to settle down.
- Enhances Training Opportunities: This command works excellently in conjunction with other commands, teaching your dog to follow multiple requests and improving their overall obedience.
Step-by-Step Instructions for Teaching the “Go to Your Place” Command
Training your dog to go to their designated area should be a fun and engaging experience. Here’s how you can successfully teach this essential command:
Step 1: Choose a Designated Spot
Decide where you want your dog’s place to be. This could be:
- A dog bed
- A mat
- A crate
Whichever location you choose, ensure it’s comfortable and convenient for both you and your dog.
Step 2: Gather Your Supplies
Like the sit command, have the following on hand:
- High-value treats: Use treats your dog finds irresistible.
- A designated mat/bed: This is where they will go.
- A leash (optional): Helpful for initial training or if your dog tends to wander.
Step 3: Introduce the Spot
- Familiarization: Show your dog the designated spot, encouraging them to investigate it. Use treats to reward exploration around this area without prompting them yet.
- Use Positive Reinforcement: Once your dog naturally approaches the spot, offer praise and treats to create a positive association with it.
Step 4: Teach the Command
- Put the Command into Action: Stand near the designated spot and use a simple cue like “go to your place” while gently guiding them towards it.
- Reward Immediately: Once they are on the mat or bed, offer treats and enthusiastic praise to reinforce this behavior.
- Practice Repeatedly: Repeat this step multiple times, gradually adding distance between you and the spot.
Step 5: Add Duration and Release
- Increase the Duration: Once your dog gets the hang of it, ask them to stay in their place for a few seconds before rewarding them. Gradually increase this time as they become more comfortable.
- Release Command: Use a release word, like “free” or “okay,” to signal they can come out of their spot, ensuring they understand they can leave when permitted.
Step 6: Generalization
Practice the command in various environments and with different levels of distractions to solidify their understanding of the cue. This ensures that your dog can successfully go to their place no matter the situation.
Common Challenges and How to Overcome Them
Training a dog to go to their place can come with its own set of challenges. Here are some common issues and solutions to help you navigate them:
1. Lack of Interest in Their Spot
Solution: Make the area more appealing! Use comfortable bedding, toys, and high-value treats to encourage your dog to spend time there.
2. Resisting the Command
Solution: If your dog is hesitant, be patient. Encourage them with treats and excitement. You can start with the leash to guide them if necessary.
3. Getting Distracted Easily
Solution: Start training in a quiet environment and gradually work up to more distracting ones, rewarding your dog for maintaining focus.
4. Inconsistent Behavior
Solution: Consistency is key. Make sure everyone in your household uses the same commands and follows the same training techniques so that your dog doesn’t become confused.
5. Dog Leaves Their Spot Early
Solution: If your dog leaves their designated area prematurely, gently lead them back and remind them of the command. Reinforce the “stay” frame of mind with short duration increases.
Conclusion: The Key to a More Relaxed Home
Teaching your dog the “go to your place” command not only fosters a sense of calm in your household but provides your furry friend with a designated retreat for relaxation. This command offers numerous benefits, including improved behavior, independence, and clarity in communication. By employing patience and positive reinforcement, you can seamlessly introduce this command into your home.
Positive Reinforcement Techniques: Enhancing Your Dog Training Experience
When it comes to dog training, positive reinforcement is a powerful tool that can significantly improve your experience and yield better results. By associating desired behaviors with rewards, you foster an environment of trust and motivation in your canine companion. In this section, we will explore the role of positive reinforcement in teaching commands, highlight various techniques, and provide tools that can help you maintain consistent training.
The Role of Positive Reinforcement in Dog Training
Positive reinforcement is based on the concept of rewarding desirable behaviors to encourage their repetition. Here are some of the key benefits:
- Builds Trust: Using positive reinforcement helps establish a bond of trust between you and your dog. By rewarding your pup for following commands, they learn that training is a positive experience.
- Encourages Motivation: Dogs are more inclined to learn when they expect a reward. Positive reinforcement taps into your dog’s natural instincts, making training both enjoyable and effective.
- Reduces Anxiety: By focusing on rewards rather than punishment, positive reinforcement minimizes anxiety. This means your dog will be more relaxed and responsive during training sessions.
- Fosters Better Learning: Studies show that dogs trained with positive reinforcement often learn faster than those trained with aversive methods. Your pup will be eager to demonstrate their skills rather than fearful of possible repercussions.
Effective Positive Reinforcement Techniques
Utilizing positive reinforcement doesn’t have to be complicated. Here are some techniques to incorporate into your training routine:
1. Treat Rewards
- High-Value Treats: Identify what motivates your dog the most. This could be small pieces of high-value treats or their favorite toy. The more desirable the reward, the more effective it will be in reinforcing the behavior.
- Variable Reward System: Mix up the rewards. Sometimes offer a treat, other times provide affection or playtime. This keeps your dog intrigued and eager to perform.
2. Clicker Training
- Using a Clicker: A clicker is a small device that makes a distinct sound when pressed. It serves as a “marker” to indicate to your dog that they’ve performed the desired behavior correctly.
- Technique: When your dog performs the command correctly (like sitting), click the device immediately, followed by a treat. This helps create a clear association between the command and the reward.
3. Verbal Praise
- Excited Tone: Your voice can be a powerful reward. When your dog successfully obeys a command, use enthusiastic verbal praise. Phrases like “Good Boy!” or “Well Done!” create a positive atmosphere and affirm the behavior.
- Consistency Matters: Ensure you use the same verbal cues each time so your dog understands which actions are being rewarded.
4. Enthusiastic Affection
- Physical Touch: Petting, cuddling, or an excited belly rub can reinforce good behavior. Many dogs find physical affection just as rewarding as food!
- Timing is Key: To maximize the effect of your affection, make it immediate. As soon as your dog complies with the command, show them your love!
5. Ignoring Unwanted Behavior
- Redirecting Attention: If your dog performs an unwanted behavior (like jumping up), ignore them until they calm down or sit. Once they do, reward them for the good behavior. This teaches your dog that calmness earns rewards while jumping does not.
Tools to Help with Consistent Training
Incorporating tools into your training regimen can significantly enhance your consistency. Here are some valuable aids:
- Treat Pouch: A treat pouch allows you to keep your rewards easily accessible during training. This promotes quick reinforcement and reduces downtime between commands.
- Clicker: As previously mentioned, a clicker is an excellent tool for marking the desired behavior. They are portable, easy to use, and help train your dog more effectively.
- Training Collar: A well-fitted training collar is crucial for managing walks and attention during training sessions. Use it in a way that reinforces positive behavior rather than relying on it as a corrective tool.
- Training Schedule: Establishing a regular training routine creates consistent learning opportunities. Dedicating just 5-10 minutes daily can lead to measurable progress in your dog’s behavior.
When it comes to mastering commands like sit, stay, or come, positive reinforcement should serve as your primary strategy. Its role in building a harmonious relationship between you and your dog cannot be overstated.
Remember to stay patient and maintain a positive attitude throughout your training sessions. After all, a happy dog makes for a happy owner!

Conclusion: The Importance of Teaching Commands Early
Teaching essential commands before the age of two is not just beneficial; it’s vital for raising a well-behaved and happy dog. Training during this formative period lays the groundwork for a lifetime of positive behaviors, reinforcing a strong bond between you and your canine companion.
Why Early Training Matters:
- Behavior Foundation: Puppies are particularly impressionable in their early months. Instilling commands like “sit” early on helps shape their behavior and personality. Early training can prevent bad habits from forming, leading to fewer behavioral issues down the line.
- Enhanced Communication: Teaching commands provides your dog with the skills to understand what you want from them. This enhances communication, making it easier for you to convey your expectations.
- Stronger Relationship: Engaging in consistent training creates a sense of teamwork. Your dog learns to trust your guidance, which fosters a more harmonious relationship.
The Benefits of Essential Commands:
- Improved Safety: Teaching commands like “sit” or “stay” can be crucial for your dog’s safety in public or potentially hazardous situations.
- Socialization: A dog that understands commands is easier to socialize in different environments, helping them adapt to new people, places, or situations without fear or aggression.
- Reduction of Stress: A well-trained dog is more relaxed and less anxious, leading to a happier lifestyle for both pet and owner. They know what to expect and how to behave, creating a peaceful home environment.
Encouragement to Start Training Now: If you haven’t yet started training your dog, there’s no better time than now. Begin with small sessions that focus on mastering the sit command and gradually branch into more complex commands as your dog becomes comfortable. Remember, consistency and patience are key—each command learned takes you one step closer to a well-mannered pet.
In conclusion, investing time in training your dog early in life is the cornerstone to ensuring they grow up to be well-adjusted and obedient. Happy training, and don’t forget to share your experiences and progress!


news via inbox
Nulla turp dis cursus. Integer liberos euismod pretium faucibua
